Not my tidiest job but hopefully it will work…
The whole rewiring of all the cables, installation of new lithium batteries, new charger/inverter, etc. all started with the fridge. The fridge could not keep cool with a hot summer even if we ran it on manual with almost full power. There was also a considerable power consumption when we had to run the fridge at such high power.
When I had this issue, I called Thermo Produkter that has made the refrigerator systems. After some testing, we could verify that the refrigerator systems were working but the box was not isolated enough.
Luckily the CEO at Thermo Produkter that was helping med had actually owned an Arcona 400 before. He had the same issue with his box and had done a reisolation of the box. After detailed instruction of how he had done it on his boat I even got the contact details of the current owner of his old boat.
The new owner was really helpful, and I could even drive out to his boat and look at how it was done.
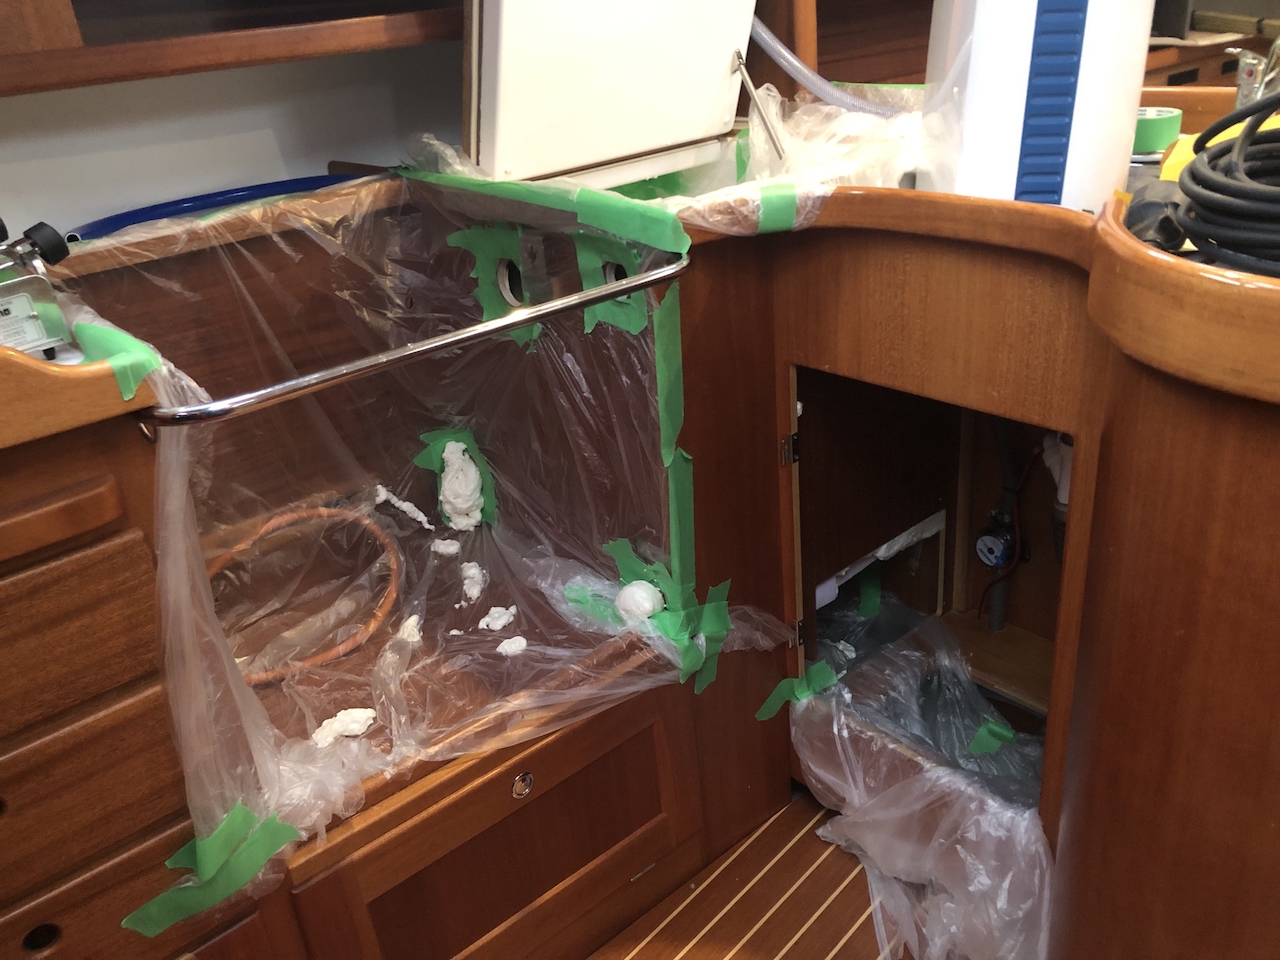
When examining the existing isolation, it was only about 25-35mm thick. The problem was to access the outside of the box without having to dismantle the whole pantry. I knew that if I would dismantle the pantry I would be able to reinstall it as nice as it had been installed.
By adding isolation, I would improve the isolation from the existing 25-35 mm to around 90 mm underneath the box and 50-60 mm around the box.
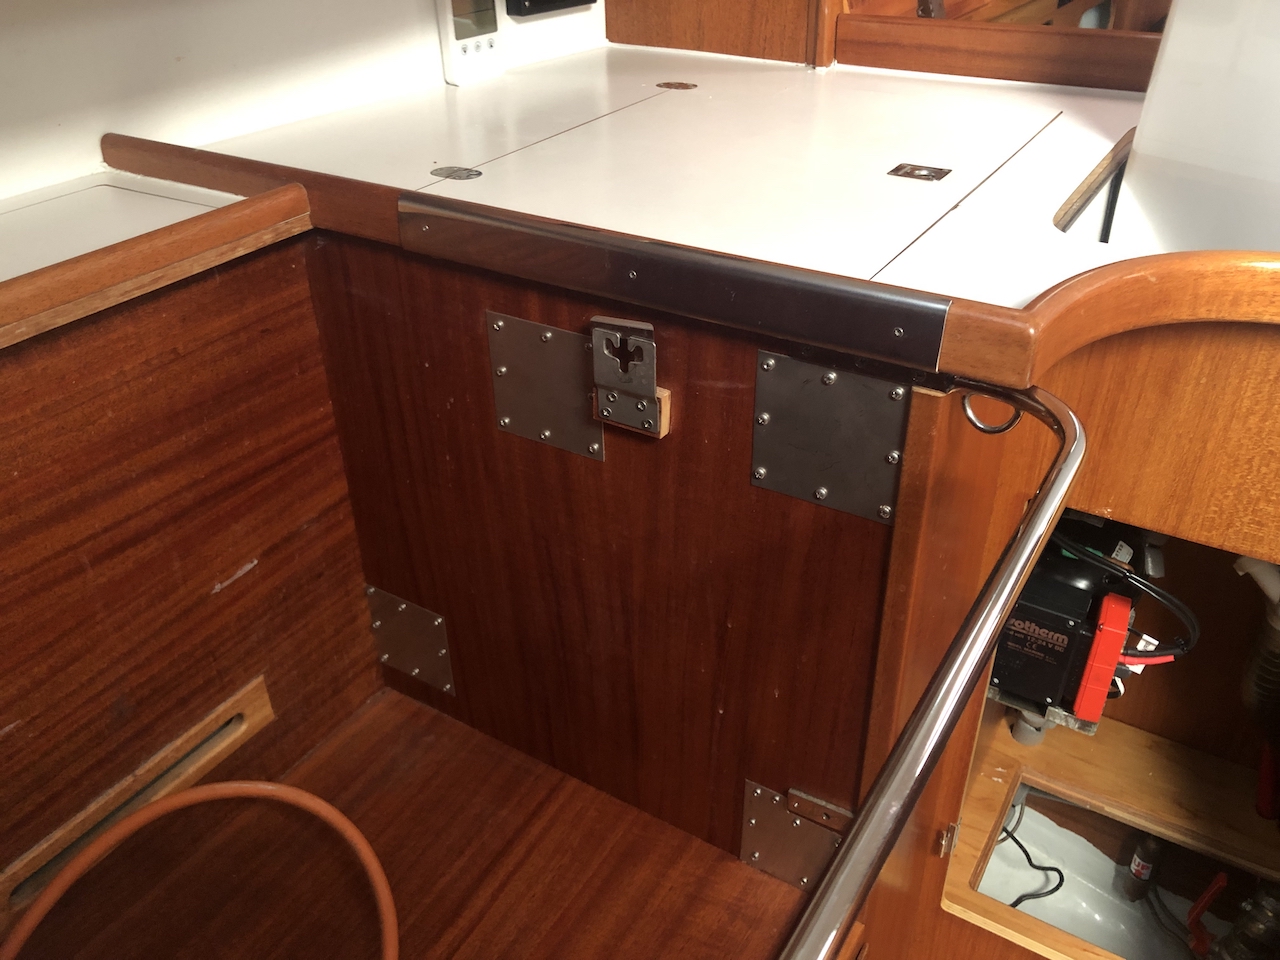
The only access to the box was a small hatch that gave me access underneath the box. The compressor was also attached on the inside of this hatch, creating additional heat just below the box.
Initial plan
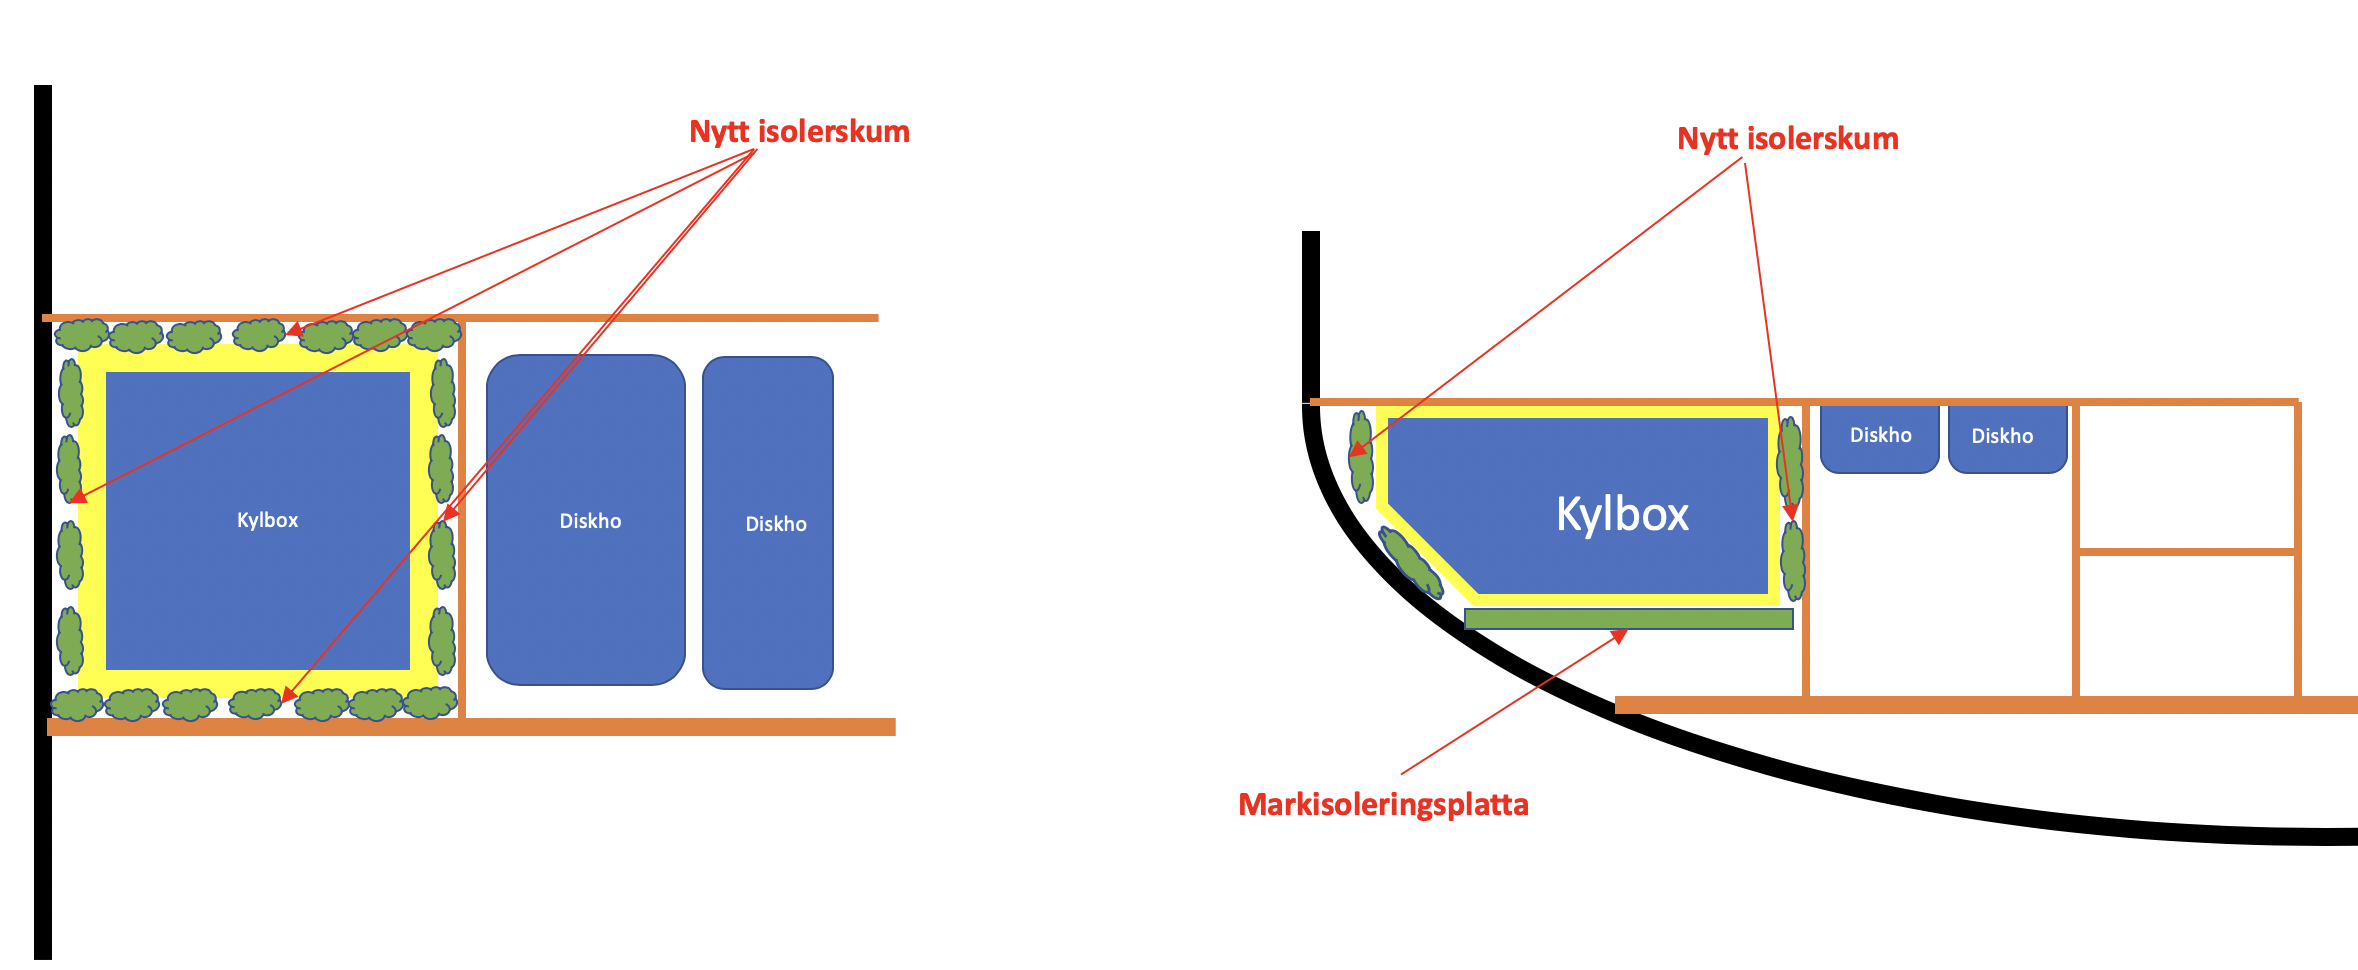
- Glue isolation plates underneath the box with foam to cover unevenness of existing isolation underneath the box
- Drill holes on three sides of the box for outside access to foam the section between the plywood and the existing isolation with two-part low expanding foam
- Drill hole from inside the box behind the plate and foam the fourth side of the box with two-part low expanding foam
- Move compressor from underneath box to underneath sink
- Cover drill holes with aluminum plates
Sticky stuff and not enough two-part foam
It all started ok. The isolation plates could be glued to the bottom of the box. I also started foaming with a special two-part foam that would stop expanding when it met resistance.
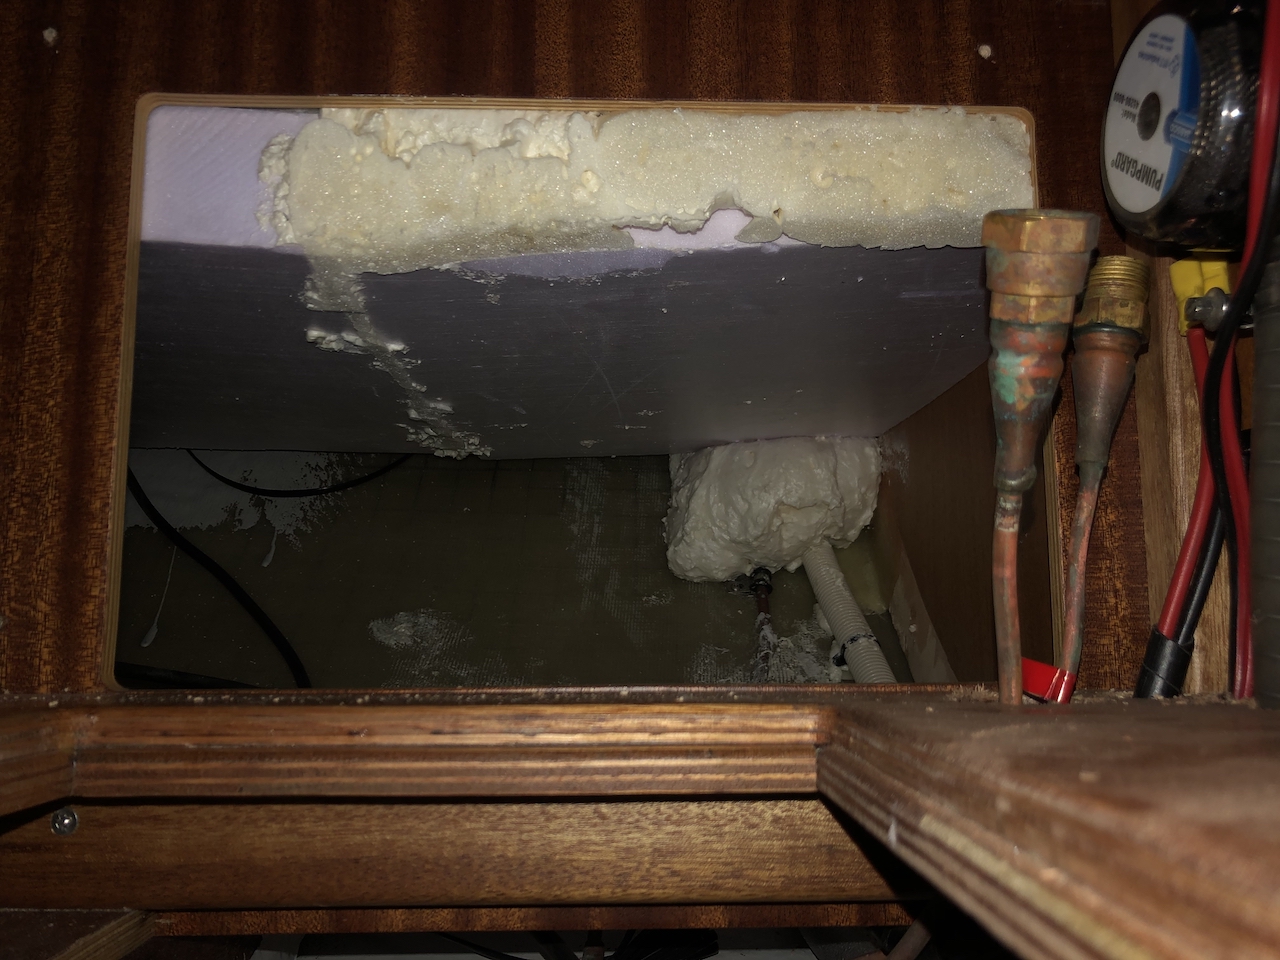
I had six cans of a special two-part foam used in the car industry to foam bars on cars to remove sound and vibration. Great stuff that would expand but would never damage anything since the expansion would stop when the foam met resistance. The only problem was that I ran out of that foam when 25 % was done…
Using the cool foam that I had managed to get hold of did not work out. I had to resort to using the simple, cheap foam found instead with the risk of over-expansion.
I was also afraid that when I added the last layer of foam that it should not cover all the way up to the top of the box. But would cover the hole I used to apply the foam from.
From not enough to too much
I had not calculated with the difference in expansion between the two different foams. The cheap foam expanded about 3-4 times as much as the good two-part foam. So from worrying about not adding enough foam, I worried about having added too much foam or having added too much foam at once for it to settle properly.
In the end, it all worked out well. I had added way too much foam. But it all expanded outside the box through the holes drilled for applying the box.
Stupid stuff when not coordinating properly
Both me and Johan from Gustavsbergs Marina messed up in our coordination. Either I should have waited with foaming until Johan was done running the hoe for filling the water tank from the deck. Or Johan should have left the old hoe in place until I was done.
Instead, I accidentally foamed a section of where the hoe for filling the water tank would run. Johan had to spend a little bit of time cutting parts of the foam to fit the hoe for filling the tank. Fortunately, this was only a small section of where the hoe would run, so it was easily fixed.
Once the foam had settled, it was easy to cut off all the foam that had expanded outside the box.
Compressor
Unfortunately, I could not keep the compressor where it was located. When it was underneath the box, it generated heat that would affect the box. When adding more isolation underneath the box, it would also not fit underneath the box. One option was to move the compressor 1.5 meters forward of the water tank. But then I would have to add additional pipes and risk having an incorrect volume of coolant in the system.
The second best option was to mount the compressor underneath the sink. This used to be where we kept our old waste bin. The installation of the compressor is not perfect. The wires from the compressor are a bit exposed. But this was the only option without having to extend the pipes.
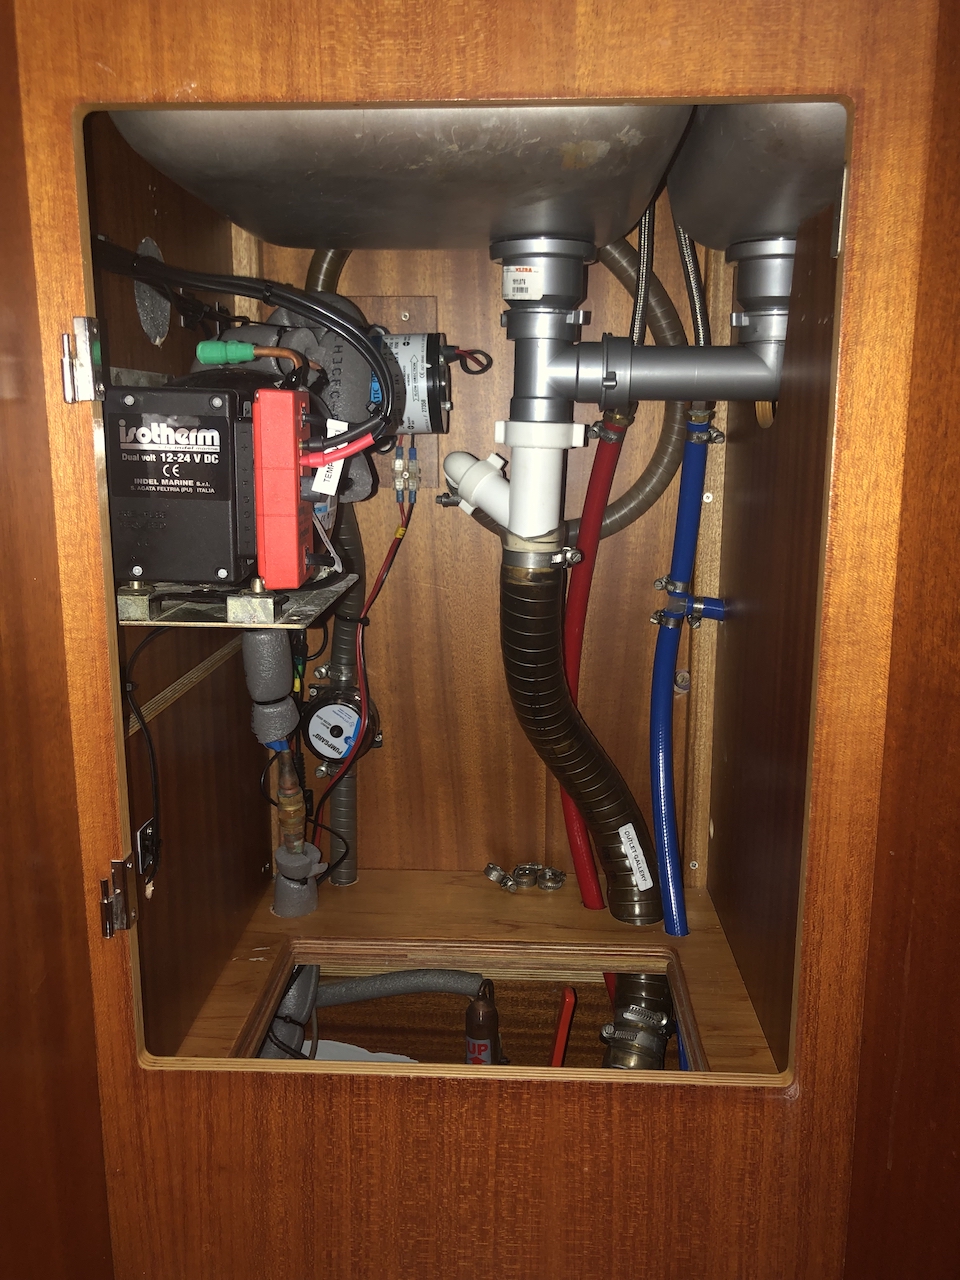
The positive is that the new location is less exposed to water intake into the boat since the compressor is not mounted 40 centimeters higher up.
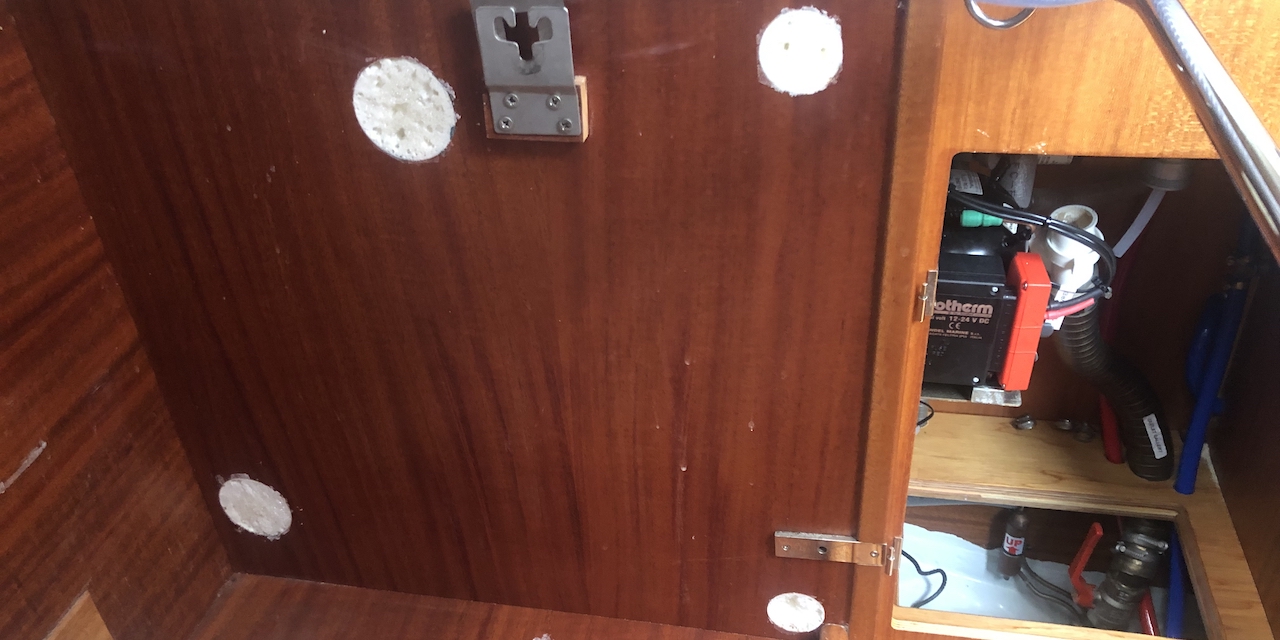
Covering the holes
In total, I had drilled nine holes for filling the foam. To cover them all, I fitted small aluminum plates. This is more to protect the foam from the kid’s curious fingers than anything else. None of the holes will really be exposed since they are all located either behind the sofa cushions, the stove or the coolant plate inside the box.

One thought on “Added isolation on the icebox”