Alternator upgraded to a Balmar 120A alternator with serpentine belt conversion and a MC-614 regulator. Tachometer display replaced and tachometer calibrated for the new alternator.
In a previous post, I wrote about the risks of damaging the alternator when switching to lithium batteries and different ways of how to protect the alternator.
Protecting your alternator when switching to lithium
With the plan to add 800W of solar panels, the primary source of charging our batteries will be solar. But we also want another effective way of charging our battery as well as protecting our alternator when using lithium batteries. We don’t have room to add a second larger alternator, so the only option of upgrading the alternator is to replace the alternator with a new small case alternator.
These were the reasons why we wanted to do something about the existing alternator.
- Improve the charging from the alternator
- Set all the optimal charge parameters for lithium
- Protect the alternator from over-heating
- Protect the alternator from a load dump
So, in the end, we decided to upgrade the alternator with the following.
- Balmar 6 Series 120A alternator, larger alternator than needed to be able to do smaller current limit (120A running at 102A max)
- Balmar MC-614 external alternator regulator
- Balmar AltMount Serpentine Pulley Conversion Kit
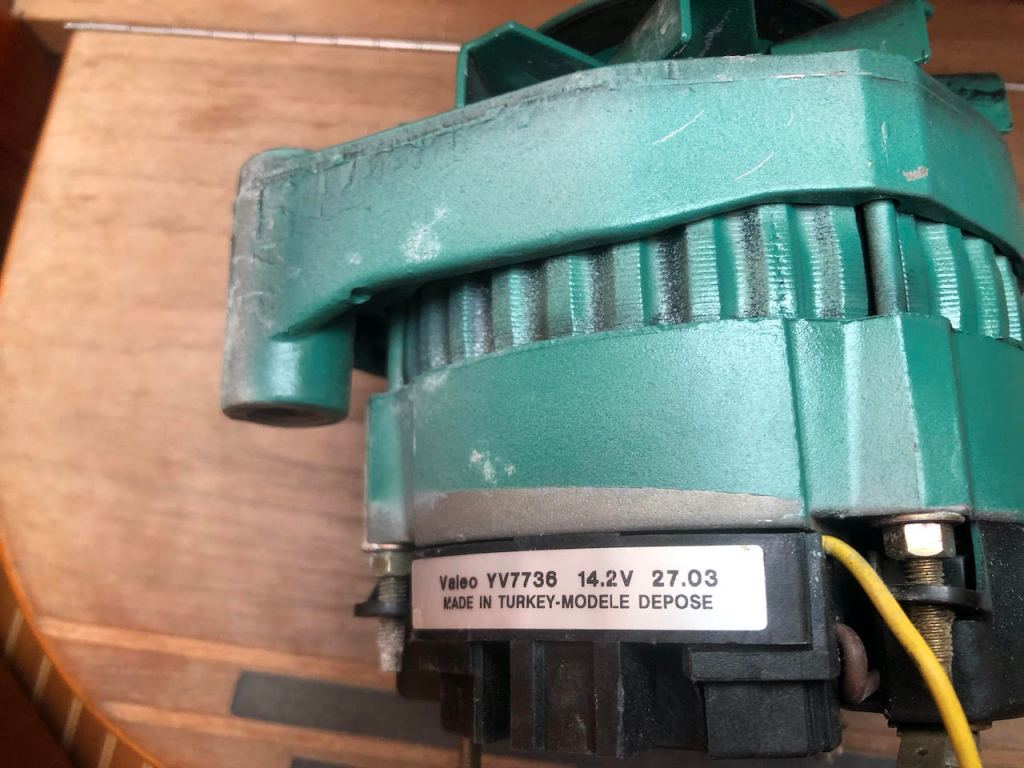
Alternator
The old stock alternator on the VolvoPenta MD-2040 is a small case 60A Valeo YV7736 14.2V alternator. This alternator has no external regulator and uses a single V-belt, and can not be fitted with an external regulator. So there is no way to set all the parameters for charging the lithium batteries or protect the alternator from overheating with an external regulator. I also doubt that it will be close to delivering the rated 60A charging unless you run it at very high RPMs.
After reading a lot of positive things about the Balmar alternators and how they deliver a lot of charge current even at low RPMs, we decided to go with the Balmar. These alternators are made for running on boats e.g., charging coast guard boats from the alternator while they are docked. There are other options than Balmar, such as Sterling, Mastervolt, etc. that make suitable alternators for boats. But we ended up choosing Balmar partly because we wanted one brand for all the conversion needed for the alternator.

With an alternator pulley ratio of 2.166, the Balmar 120A alternator will deliver 120A (cold) at 1 385 RPMs on the engine. 105A at the same RPMs when hot. At higher RPMs, it will provide even more than 120A.
Serpentine belt kit
But since going higher than 70A on the alternator, we also needed to upgrade the V-belt. A single V-belt cannot handle more than 70A without breaking or creating a lot of belt dust going into the alternator. Balmar doesn’t even sell alternators for single V-belts at higher Amp output.

AltMount Pulley Kit: 48-VSP-MD-B for VolvoPenta MD2040
Balmar has kits for converting to serpentine belts on your existing engine. Different kits based on what type of engine you have. These are aluminum disks that fit over the existing crank pulley and replace the water pump pulley. It seemed like an easy solution even though it was expensive.
External alternator regulator
When we were searching for an external alternator regulator, the Balmar MC-614 seemed like the best one out there. The WakaSpeed WS500 was released in late winter 2019, shortly after we bought our regulator.
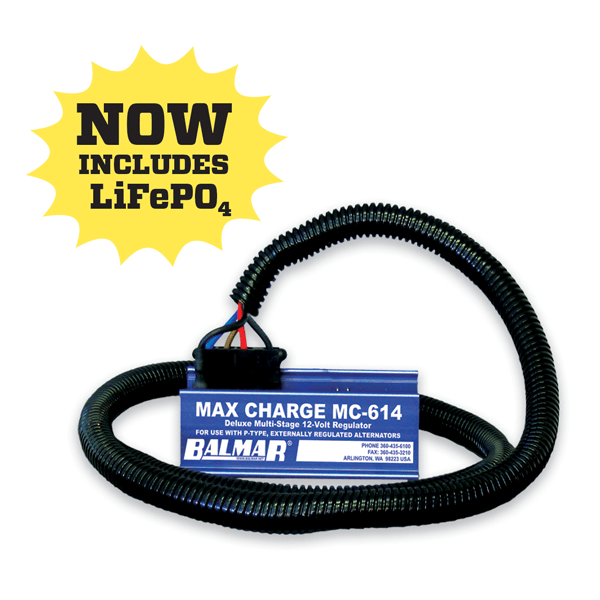
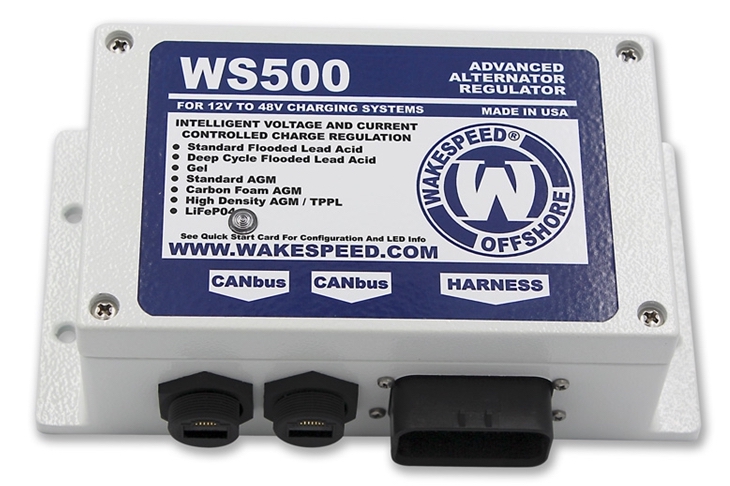
The WS500 has some excellent features that the Balmar regulator lacks, such as actual CC/CV charging and the option of a CAN bus. In the end, I am happy that we got the Balmar regulator due to their excellent support and also having everything related to the alternator from the same brand.
With the MC-614 regulator, almost all the parameters can be configured to the settings you want. The regulator also has temp sensors for both the alternator and the battery. With lithium batteries, you absolutely don’t want battery temperature voltage compensation! But you want the alternator temperature regulation. When charging lithium batteries, the alternator can get extremely hot, and you want the regulator to dial down the alternator and limit the current based on the alternator temperature.
There are also some other excellent features, such as the Belt Load Manager, that will limit the current to avoid overheating in the first place. As well as setting the individual values of Absorption, Bulk, and Float charge.
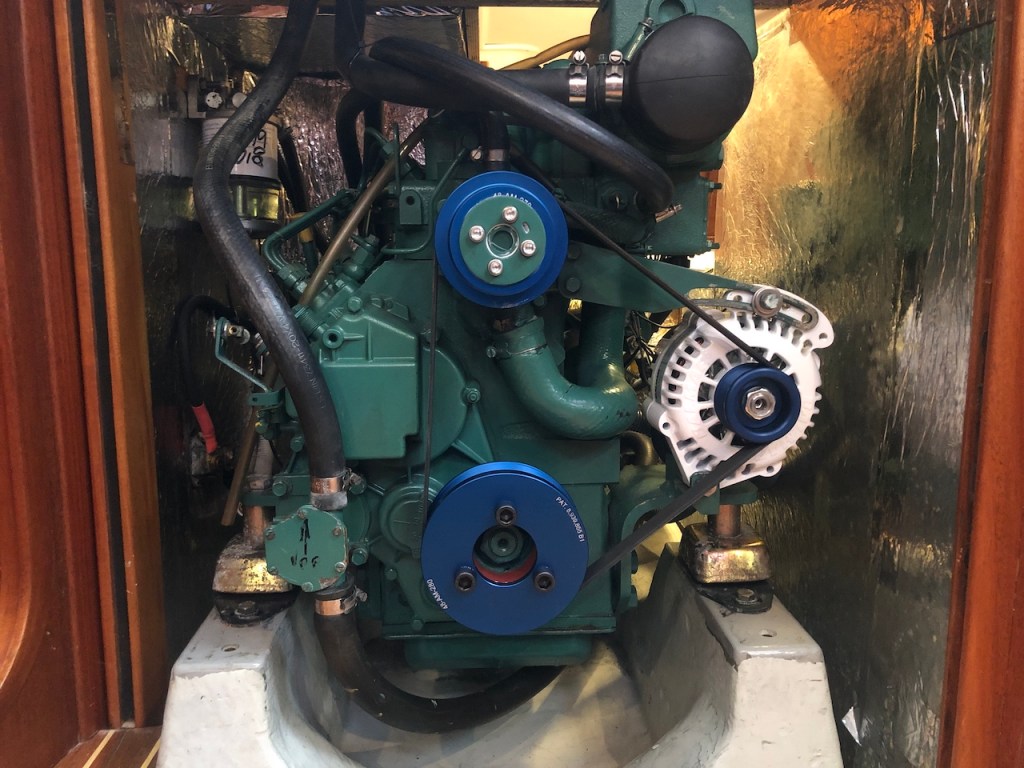
Installing the serpentine kit and alternator
The serpentine kits are supposed to fit perfectly to your engine. But since our MD2040 is one of the latest models, I suspect that it had not the same crank pulley dimensions as the older models.
The new serpentine crank pulley would just not fit over the existing crank pulley! The outer diameter of the existing crank pulley was 2 mm wider than the inner diameter of the serpentine crank pulley. The new water pump pulley fits perfectly.
I felt devastated. How should I machine the existing crank pulley to fit? As an amateur, you don’t have a fully stocked machine shop to fix any issue. But after contacting the Swedish reseller of Balmar, I got my hopes up. They told me that if I managed to get the crank pulley to them, they would fix it.
Luckily a boat mechanic was replacing our rubber seal for the S-drive at the same time as I was installing the alternator. He could use his special tools to remove the existing crank pulley. A quick drive to the reseller, and they had it fixed immediately.
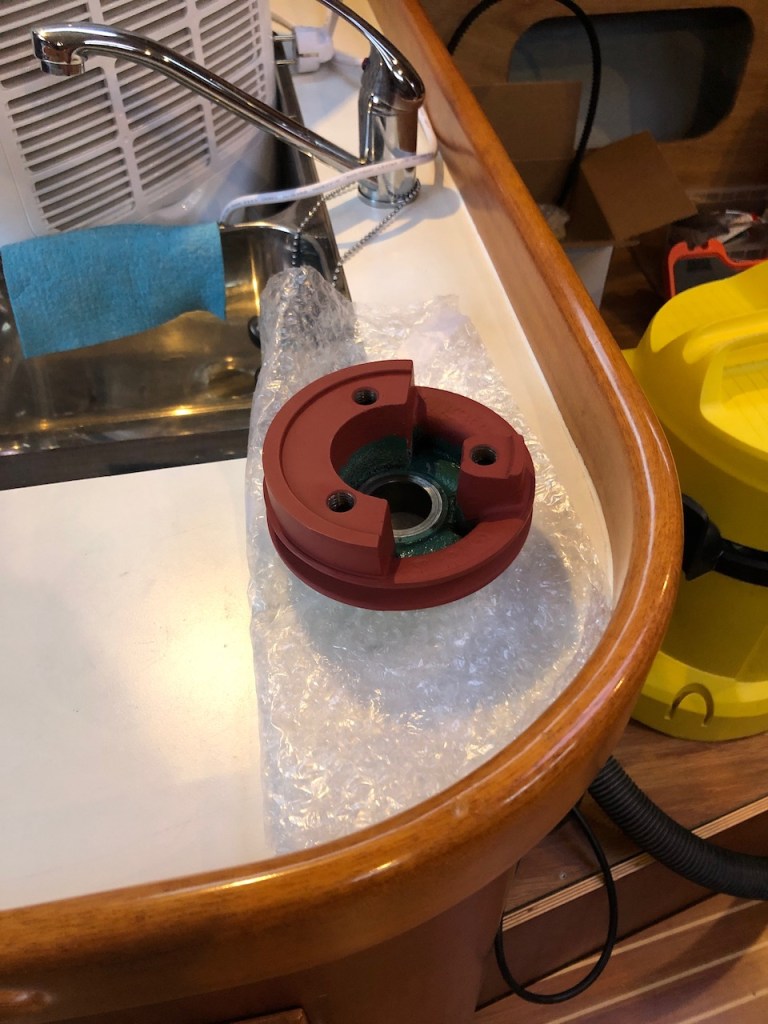
Once the crank pulley fit, I only needed to add some rust protection and ask the boat mechanic to use his tools to mount crank pulley. The rust protection was not the VolvoPenta green but good enough. Now I was back in business!
When the issue with the crank pulley was fixed, it was straightforward to install the serpentine belt conversion and the alternator. A lot of Tef-Gel was added to avoid corrosion between the engine and the aluminum serpentine pulleys.
After mounting the alternator, a lot of time was spent verifying the alignment between the crank pulley, the alternator pulley, and the water pump pulley. I followed the guide on Marine How To and using an aluminum L-piece and calipers. Together with Jan from Izusa we could verify that all the alignments were perfect without needing further adjustment.
The alternator was easy to install. I also added an oversized alternator spacer instead of the traditional spacers that deform over time.
But I have had some issues getting the proper belt tensions, so I will most likely add Belt Buddy that will make the tensioning of the belt easier.
Installing the external alternator regulator
The location I choose for the regulator was just outside the engine room under one of the bunks to avoid the heat in the engine compartment. I wish I could have chosen a place where I could have access to the display more quickly. But due to the amount of cabling and three kids, I didn’t want to have it where you could easily disconnect anything by mistake.
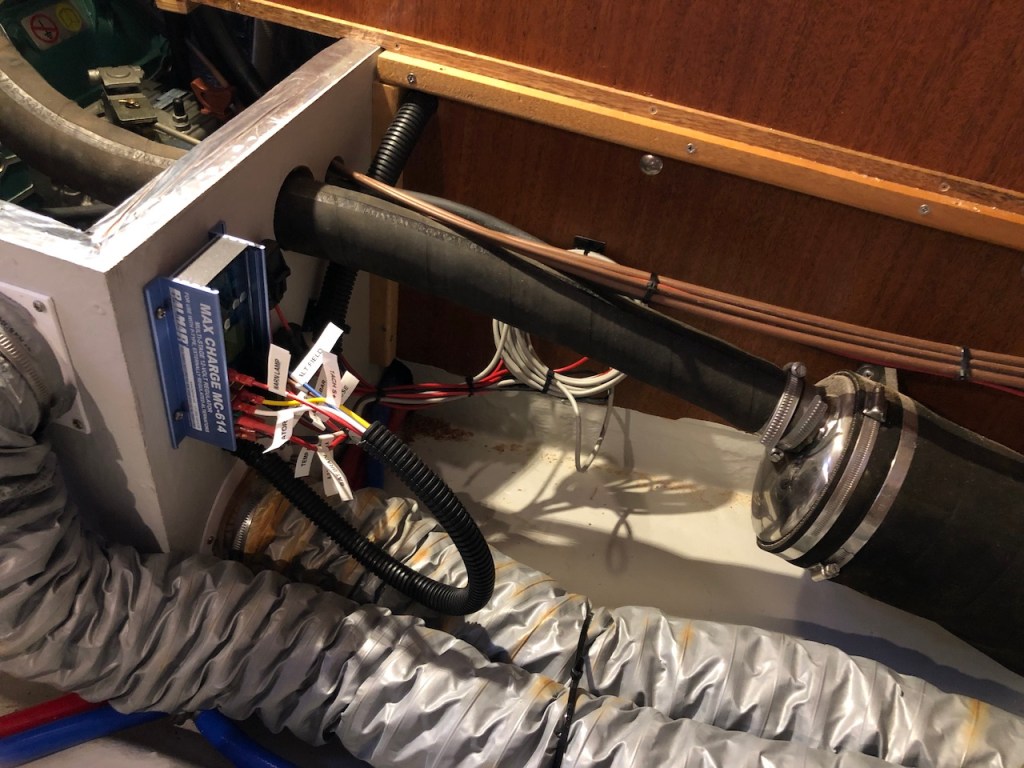
Installing the regulator took quite some time. VolvoPenta does not follow the standards regarding cabling of alternators and has an incompatible D+ circuit. The tachometer on the instrument panel also draws its power from the D+ through a 9 W resistance.
Balmar even has a FAQ regarding this topic on their website.
After installing the regulator and doing the cabling following the usual standards, after 10 seconds, the alarm buzzer goes off, and the battery charging lamp shows and will not go off. Since I also want warnings on the instrument panel for over-temperature on either the alternator or the battery, I need to connect the warning lamp to the MC-614.
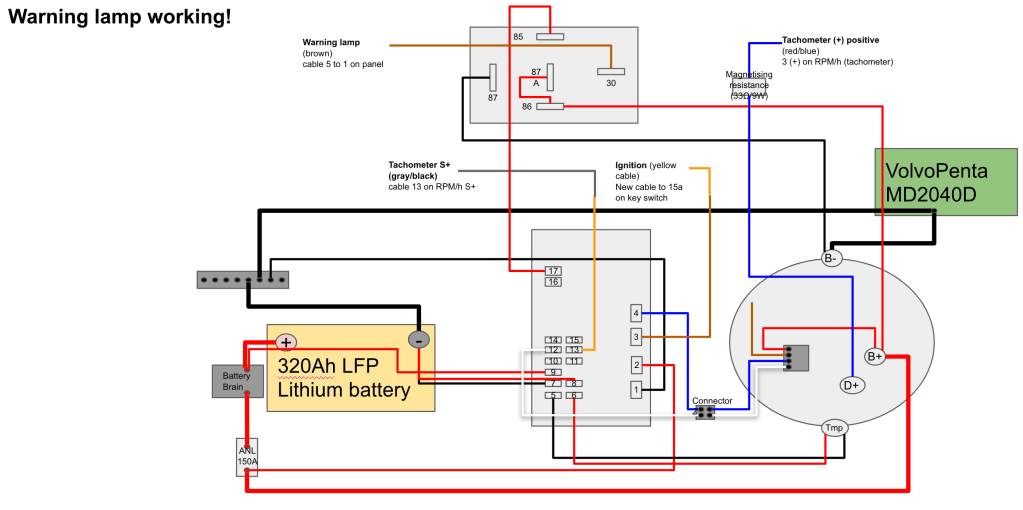
I had to switch when the warning lamp on the VolvoPenta instrument panel should go to the ground, and when it should be provided +12V. By adding a simple relay between the MC-614 and the warning lamp, I could make this happen.
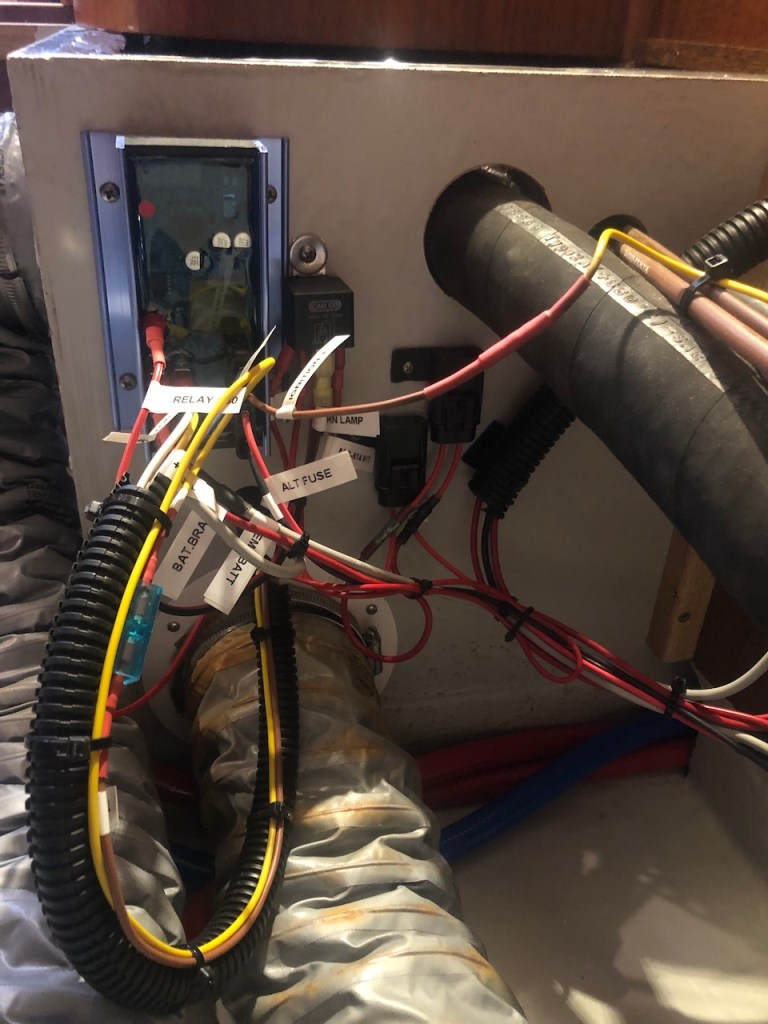
The alternator was now running fine, and the instrument panel with the warning lamp was also working.
Configuring the MC-614 regulator
If you have read my previous posts, I want to use very conservative settings for charging my lithium battery.
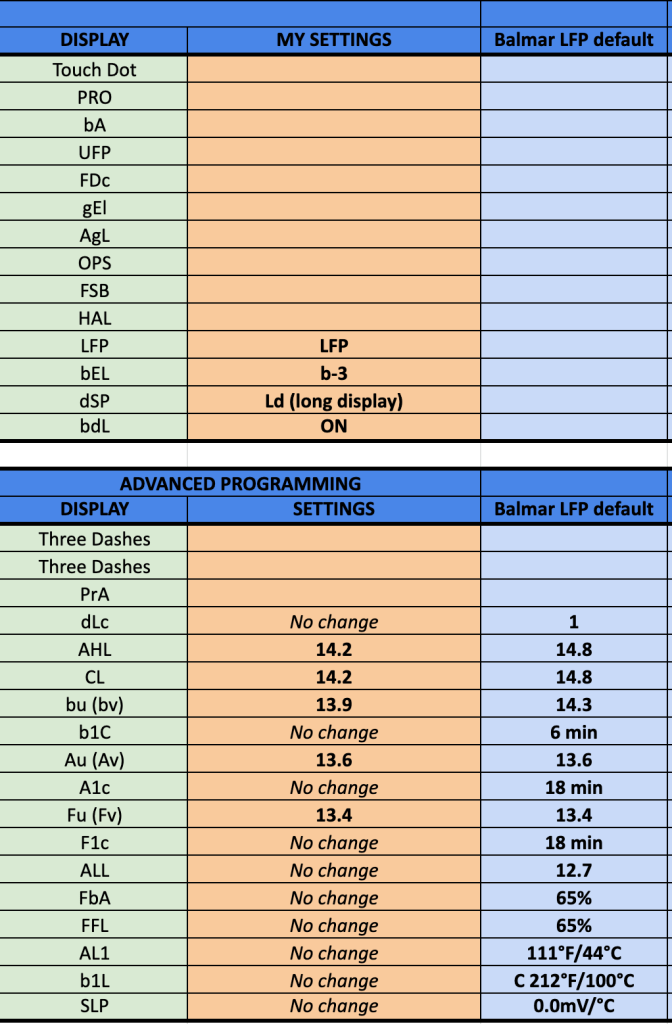
The are the settings I wanted to apply:
- Bulk voltage at 13.9 V
- Absorption voltage at 13.6 V
- Float voltage at 13.4 V
- High voltage warning at 14.2 V
- Disable battery temp compensation
- Belt Load Manager with field reduction of 15 %
- Max alternator temperature at a healthy level
I tried using a lower float voltage, in the beginning, to disable float altogether. But if I used too low float voltage, the tachometer would go off and on. When the alternator wouldn’t charge in float since it was set so low, the tach wouldn’t get any power from the alternator D+ and stop working. Once charging started again the tachometer would start working again.
Programming the regulator can be a bit tricky until you get the hang of it. You are using the back of a Balmar screwdriver with a magnet and doing a lot of press and hold to do all the settings.
Marine how to has a great article about programming the MC-614. This article also has videos showing how to program your MC-614 as well as a Cheat Sheet.
Marine How To – Programming a Balmar External Voltage Regulator
To achieve the settings I wanted to use on the alternator with the regulator, I set the following settings:
Adjusting the tachometer
Once the alternator was up and running with all the settings from the regulator, I needed to reconfigure the tachometer.
The tachometer also has an hour meter. There is a known issue with moisture damaging the hour meter display on these tachometers. The hour meter data is not lost, just the ability to see the number of hours. Usually, this is not critical.
To be able to configure the tachometer, the display must work. A new VolvoPenta tachometer is extremly expensive. But you can order cheap new displays online and just replace the display. Followed a tutorial online, replacing the display took a maximum of 5 minutes. By just replacing the display, the hour value is correct since this is stored in the tachometer and not on the display.
The tachometer on the VolvoPenta instrument panel is a VDO tachometer, and I spent a lot of time googling and searching for how to calibrate the tachometer. There is a lot of information about configuring the standard VDO tachometers. But our tachometer was a tachometer that VDO had produced for VolvoPenta only.
With standard VDO tachometers, you can select the correct PuLSE value. In our case, 12.996 ((12 poles / 2) x 2.166 ratio)) and then do some fine-tuning if needed.
The VDO tachometer made specifically for VolvoPenta uses CoDE values for different VolvoPenta engines with stock alternators.
I spend a lot of time searching online to figure out a way to decode the CoDE values into something I could use. But in the end, I got some recommendations that worked. The suggestion was to skip what the different CoDE values meant. By trial and error, test the different values to find a CoDE value that was closest to the RPM on the engine and then to fine-tune.
To buy an expensive tachometer or get a cheap tachometer with long off-shore delivery time was not something I wanted to do. Someone suggested using a tachometer app on the phone. I had my doubts but was surprised how easy it was to use these free apps on the phone.
By just adding a white piece of tape on the crank pulley and using a tachometer app strobing the phone’s flash, I could get a very accurate reading of the engines RMP. Then it was easy to select the CoDE value closest to the engine’s RPM and use fine-tune to get the correct readings on the VolvoPenta tachometer.
Configuring standard VDO tachometer with hour meter
VolvoPenta specific VDO tachometer
- When holding down the button when turning on the ignition, you can set the CoDE value that has predefined values for different VolvoPenta engines with stock alternators
- When holding down the button when the ignition is on, you can set a positive or negative value to do fine-tuning
Summary
After one summer, we are thrilled with our alternator. We charge our batteries very quickly, and I am not worried about overcharging the battery or risking to damage the alternator with the lithium battery.
I had expected the installation to be a bit simpler. But I was fortunate with getting the help from both our boat mechanic Olle Gren and Start och Generator Specialisten that sells Balmar in Sweden as well as Jan on Izusa with verifying the alignment.
Follow Jan and Birgitta on their Arcona 400 Izusa on their blog
http://izusa.nu/
Marine How To article regarding alternator installation
https://marinehowto.com/marine-alternator-installation-tips-tricks/
Marine How to article regarding programming MC-614
https://marinehowto.com/programming-a-balmar-voltage-regulator/
